🌟 Stay Cool, Stay Connected!
The SenvilleLETO Series Mini Split Air Conditioner Heat Pump is a powerful 24000 BTU unit designed for year-round comfort. With its sleek design and smart home integration, it offers cooling, heating, dehumidifying, and fan functions, making it perfect for any space. The unit includes an installation package and a 5-year warranty, ensuring reliability and support for your climate control needs.
| Energy Star | Not Compliant |
| Warranty Type | Limited |
| Capacity | 2 Tons |
| Controller Type | Remote Control |
| Wattage | 2500 watts |
| Seasonal Energy Efficiency Ratio (SEER) | 17 |
| Additional Features | Inverter Compressor, heater |
| Control Method | App |
| Power Source | DC |
| Voltage | 220 Volts |
| Inverter Type | Has Inverter |
| Noise | 34 dB |
| Is Product Cordless | No |
| Installation Type | Split System |
| Cooling Power | 24500 British Thermal Units |
| Is Electric | Yes |
| Form Factor | Mini-Split |
| Color | White |
| Refrigerant | R410A |
| Item Dimensions D x W x H | 12.6"D x 33.27"W x 27.56"H |
J**F
Works like a charm!
Very quiet, and it cools down a room really well. I love having a remote, it just makes it real easy to use. I insulated my shed and had this installed. It was simple for the HVAC guys to install, appears to be good quality, and it doesn't appear to be adding much to my electric bill. I really like that the manufacturer provides a 5 year warranty if installed by a professional.
D**D
Great product-- Difficult DIY
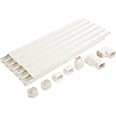
This is a great, high-quality product that functions well. I thoroughly recommend the Senville for quality and performance.The install is a difficult level DIY and should only be attempted after proper research and with proper tools.Physically installing the units is easy. Wiring the units is not difficult but is time consuming, especially accounting for running a dedicated 20A electrical circuit.Line set installation is more involved. I chose to hang the inside unit before attaching the line set because of how I chose to run the refrigerant piping inside the room and then straight through the wall to the outside unit. I made my own wall pass-through sleeve from 3" pvc to give a little more working space. The included sleeve is very thin and flimsy. Line set flare nuts MUST be torqued to spec. I had one nut that failed and had to remove, replace with an included extra, and reflare the connection when I found the leak during the first pressure test. I shortened the refrigerant piping at the outside unit to fit with no looping of pipes. I used an eccentric flaring tool to remake the connection after shortening.Next step of pressure testing with nitrogen MUST NOT BE OMITTED. You will need a HVAC charging manifold, special fittings, a micron vacuum gauge, HVAC leak test soap, a compressed nitrogen tank and regulator, and a vacuum pump. A competent pro installer will do this--but many HVAC techs skip the pressure test step.I pressure tested and found the bad flare nut leak, repaired it, and pressure tested again to 300psi nitrogen. This forces most air and water out of the lines. I left the lines on pressure, applied leak test soap and left the set up for over 1 hour. There was absolutely no leakage according to the HVAC manifold gauge.After pressure testing, a vacuum test was performed using a micron vacuum gauge to make sure all nitrogen, air and water vapor was removed from the lines. You will need special fittings as mentioned, to insure that the lines remain isolated from the pump after evacuating. I vacuumed down to 220microns and let it sit for 30+ minutes. The gauge remained well below 300 microns. (the standard is to remain below 500 microns). This step double checks for leakage and confirms removal of all gasses and water before releasing the factory charge into the system. Next, isolate the gauge from the system using the special fittings, and release the refrigerant charge from the compressor into the system. After a final check for leaks after removing all gauges and fittings, the system was ready to power up and test run.Note: the flare nuts are crudely shaped on the outside (seem to be cast, rather than machined) so normal open ended wrenches do not fit them well. You will have to use adjustable wrenches to adjust them when installing. Using a torque wrench on those flare nuts is difficult because of the non-standard finish and sizing. A $175 adjustable wrench head HVAC torque wrench (made by Yellow Jacket) would really assist here, but I had a standard torque wrench with crow's foot wrench adapters. I made it work... but that's not an easy way to do it. I doubt many techs carry the special torque wrench and will just do the flare nuts by feel based on experience.The test run of the unit revealed no leaks, so I wrapped up the line set at the connection points and finished the install. I used a line set cover flashing to protect the lines where they emerged from the outside wall. Zip ties where needed to secure the wrapping tape. Big HVAC type zip ties screwed to the wall to mount the indoor line set in permanent fashion. double checked the drain line was working properly without restriction by pouring water in the top of the inside unit and verifying full drainage. I left the primary drain line joint uncovered inside so I could have access if there was ever a blockage.The unit heats wonderfully, cooling is great, too, but I will have to confirm how that works on a really hot day this summer. You will have to run the cooling check on manual cool override if temperature is below 62º outside (it was cool here on the test day). The air output on cooling feels ice-cold.Spend the time and money to install it correctly and the Senville will serve you well, I think. If you are not comfortable doing it DIY, then hire a good installer.You will not have factory warranty without a professional installer according to Senville. I chose DIY anyway after researching the process and finding than some installers skip the pressure test. (Senville in fact does not insist on a pressure test in the install manual.)22 months in, I could not be more pleased. Keeps my garage/workshop comfortable year round (outside temps ranging from 7° to 97°) and has very little impact on my power bill. Just keep the filters and fins clean for best efficiency. So far, I have not needed to clean the blower wheel. No problems with the condensate drain at all.
E**R
Well worth the money!!!!!
I am a recently retired HVAC tech. I can only say...WOW! lets start with the item packaging. Everything was well packed and arrived undamaged. Everything seems well made and well thought out. Even the line set had perfect flares. The only thing I can say is a negative is the power/signal cable between the condenser and the air handler is about two feet shorter than the line set. The line set is easy to bend and is seamless, so if you had to re-flare it, it shouldn't split at the seam. I used a little Nylock on the flares and upon evacuation system held a vacuum with no measurable loss of vacuum in 24 hours. Once the system was pressurized, no leaks noted via leak tester or old fashioned soap bubbles. System passed all tests on startup. Even the amazon alexa setup was easy. Note that this is installed in an unconditioned space. I tested it the other morning, Outside temp was 33F. The indoor air handler was blowing 128F air!!!!! I am impressed!!! Once upon a time, you were lucky to get 90 degree air out of a heat pump. I am heating/cooling only 240 sq feet ( uninsulated) with 18000 BTU's and this thing brings the temp up quite rapidly. The fact that I can tell the system to switch on and set the temp via Alexa is awesome. Also note that there appears to be parts available as well if they are ever needed. I did have a minor issue with figuring where to plug the wifi dongle so I reached out to customer service. They were quick to respond and quite helpful, so A+ there as well. I could have spent a little less, but I felt this was all around a better product.
Trustpilot
2 weeks ago
1 day ago